For TikTok shopping videos you need clarity — but clarity usually means paying more. Video models like Seedance 2.0 charge by resolution tier: 480p, 720p and 1080p roughly double each step. Generate every clip at 1080p and testing ten creatives gets absurdly expensive. The smarter move: batch-test at 480p cheaply, then upscale only the winner to 1080p. This guide shows you how to use Clipcat Video Upscale to get a 1080p video at 480p cost.
Quick answer
Generate at 480p in the video generator (the cheapest tier) → pick the one you'll post → open Video Upscale, upload that 480p clip → choose target resolution 720p or 1080p → hit Upscale. In minutes you get an upscaled HD vertical video; download the MP4 and post it. The same 1080p output costs noticeably less than generating 1080p directly.
Why 480p-then-upscale costs less
It comes down to how billing works: Seedance 2.0 charges by resolution tier, and each step up roughly doubles the price — so generating 1080p directly is the most expensive path. Shopping is a numbers game: you need to test many clips to hit the one that pops, and paying 1080p for every one makes testing impossible to scale. Split the flow into "batch-test at 480p + upscale only the winner" and you keep most of your spend on the cheapest tier. Here's the direct comparison between generating 1080p directly and 480p-then-upscale:
| Dimension | Generate 1080p directly, every clip | 480p generate + Clipcat upscale |
|---|---|---|
| Billing tier | Pay the priciest 1080p throughout | Most spend on the cheapest 480p |
| Cost to test creatives | HD price per clip, few versions | Cheap batch output, test freely |
| Final quality | Native 1080p | Upscaled to 1080p, near-native |
| Times you pay for HD | Every single clip | Only the winning clip |
| Best for | A single, already-decided cut | Batch testing + posting the best |
This workflow pairs best with the TikTok shopping video generator: batch-output at low resolution, then upscale the winner. Not sure of your direction yet? Find your niche first with Collect Viral Videos.
3 steps to your HD video
Generate cheap, pick the winner, upscale — that's it.
1Batch-generate cheaply at 480p
In the video generator, set resolution to 480p (the cheapest tier) and generate several versions of the same product with different selling points and models. This step spends only the lowest credits — the goal is to quickly find which creative hits hardest.
2Pick the winner and upload to Upscale
From that batch of 480p clips, pick the one with the best preview or performance, open Video Upscale and upload it. You only pay HD price for this one clip — the rest of the test clips need no upscaling.
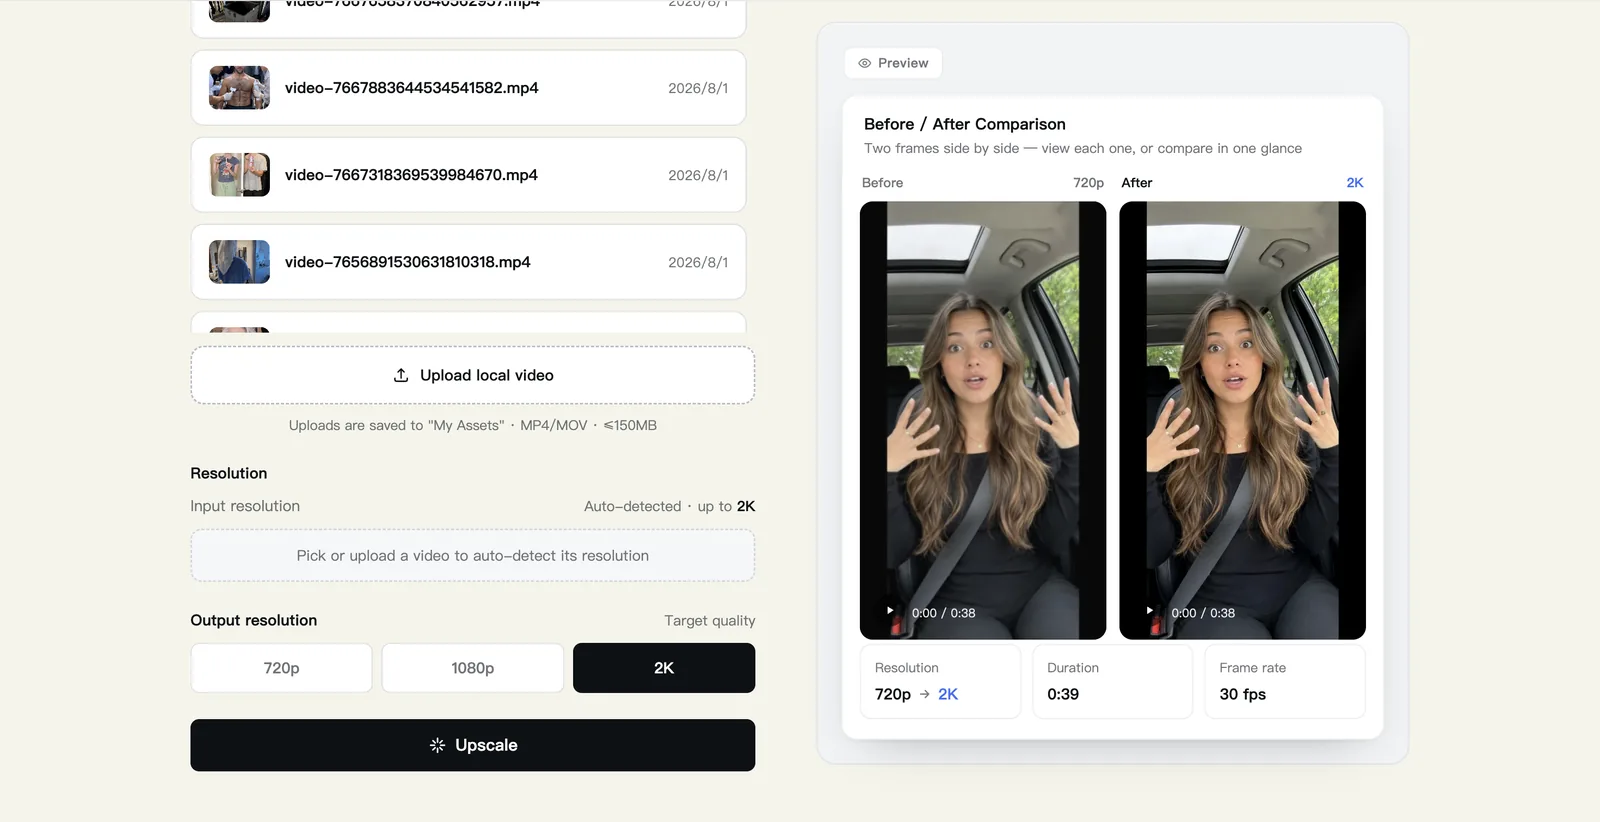
3Choose target resolution, upscale and download
Choose target resolution 720p or 1080p and hit Upscale. In minutes you get an upscaled HD video: the scene, character and pacing are unchanged, just sharper. Download the MP4, vertical by default, and post it to TikTok, Instagram Reels or YouTube Shorts.
5 keys to using Upscale and spending where it counts
To get the best quality at the lowest cost, follow these:
- Always test at 480p: don't test at high resolution — most clips get cut anyway, so low-res batch output saves the most.
- Upscale only the winner: take the best-performing clip up to 1080p, paying the HD price just once, on the final step.
- 1080p is enough for TikTok: vertical 1080p already meets platform clarity requirements — no need to chase higher or pay for resolution you won't use.
- Upscale doesn't change content, so lock the cut first: upscaling only raises clarity, not the visuals, so nail the selling point and pacing at the 480p stage and let upscaling do the final clarity pass.
- Reinvest the savings into more testing: with the same budget, 480p + upscale lets you test more creative versions, raising your odds of a hit.
To give the clip you'll upscale more viral potential from the start, find your direction with Collect Viral Videos, then batch-output at low resolution with the TikTok shopping video generator.
FAQ
Why is generating at 480p then upscaling cheaper?
Models like Seedance 2.0 charge by resolution tier — 480p, 720p and 1080p roughly double each step. Generating 1080p directly is the most expensive path. Generating at 480p first, then upscaling to 720p / 1080p, costs noticeably less while landing close to native HD.
Does upscaling change the video content?
No. Upscaling is super-resolution — it only raises the clarity and resolution of the existing video. The scene, character and pacing stay exactly the same; nothing is re-generated.
How high can I upscale?
You can raise a low-resolution video to 720p or 1080p. For TikTok shopping videos, 1080p vertical meets the platform's clarity requirements — download and post directly.
Which videos suit the batch-at-low-res-then-upscale workflow?
The creative-testing stage fits best: generate several low-res versions of the same product with different selling points and models, pick the best-performing one, then upscale only that one to 1080p — instead of paying HD price for every clip.
Can I post the upscaled video straight to TikTok?
Yes. An upscaled 1080p vertical video already meets platform clarity requirements. Download the MP4 and post it straight to TikTok, Instagram Reels or YouTube Shorts.