WHAT'S NEW · TEAM COLLABORATION

Introducing Workspaces —
your team, one shared plan.

Invite sub-accounts into your Workspace and share your plan's credits and resources so your team can create together. By the end of this post you'll know how to create a Workspace, invite members, tell the three roles apart, and filter content by account. Available on the Creator plan and above.

Clipcat Released August 2026 Creator plan and above
Shared credits
Sub-accounts draw from your plan's credits — no separate purchase.
Three roles
Owner, Admin and Operator, with clear permissions you can change anytime.
Filter by account
Assets, roles, tasks, chats and credits all filter per member.
Step

Step 1 · Create a Workspace

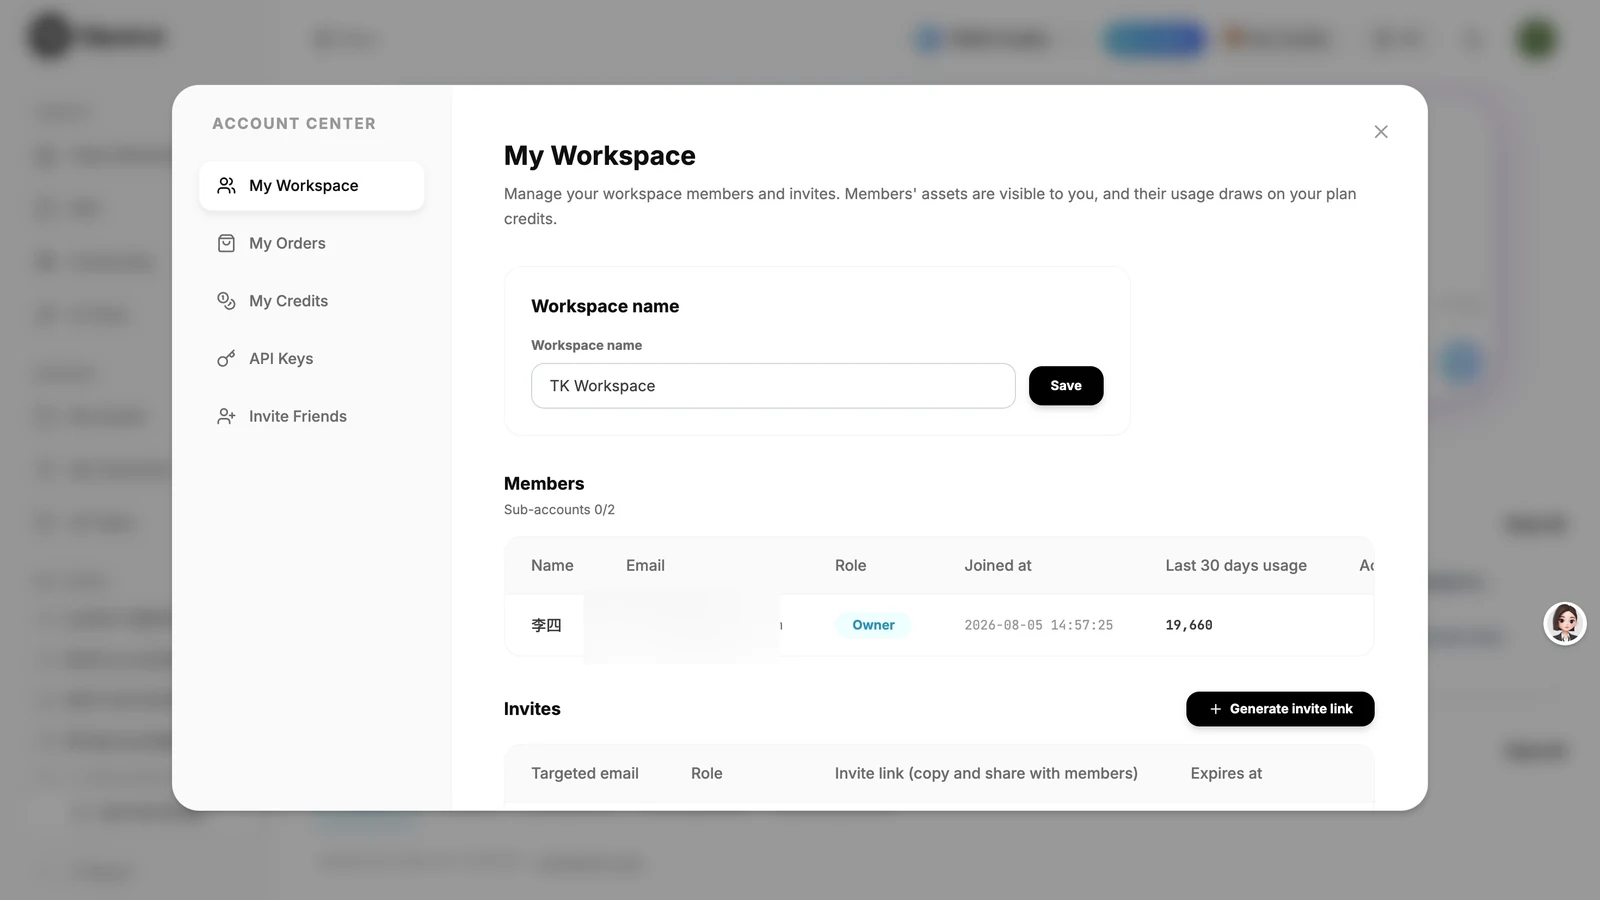
Click your avatar → My Workspace → Create Workspace, give it a name, and you're done.

1Entry: avatar → My Workspace

Set up a Workspace in a minute.

Click your avatar in the top-right corner to open the account center, choose "My Workspace", then click "Create Workspace". Enter a workspace name (for example, "Cross-border Ops Team") and confirm — your Workspace is ready. From there you can invite members to join and share your plan's credits and benefits.

  • Avatar → account center → "My Workspace"
  • Click "Create Workspace" and name it
  • Once created, start inviting members
Clipcat account center My Workspace create-workspace dialog with a workspace name field
Step

Step 2 · Invite members

Generate an invite link and share it. Members must register on Clipcat first, then open the link with that account to join your Workspace as a sub-account.

2Invite by link

Send a link, and they're in.

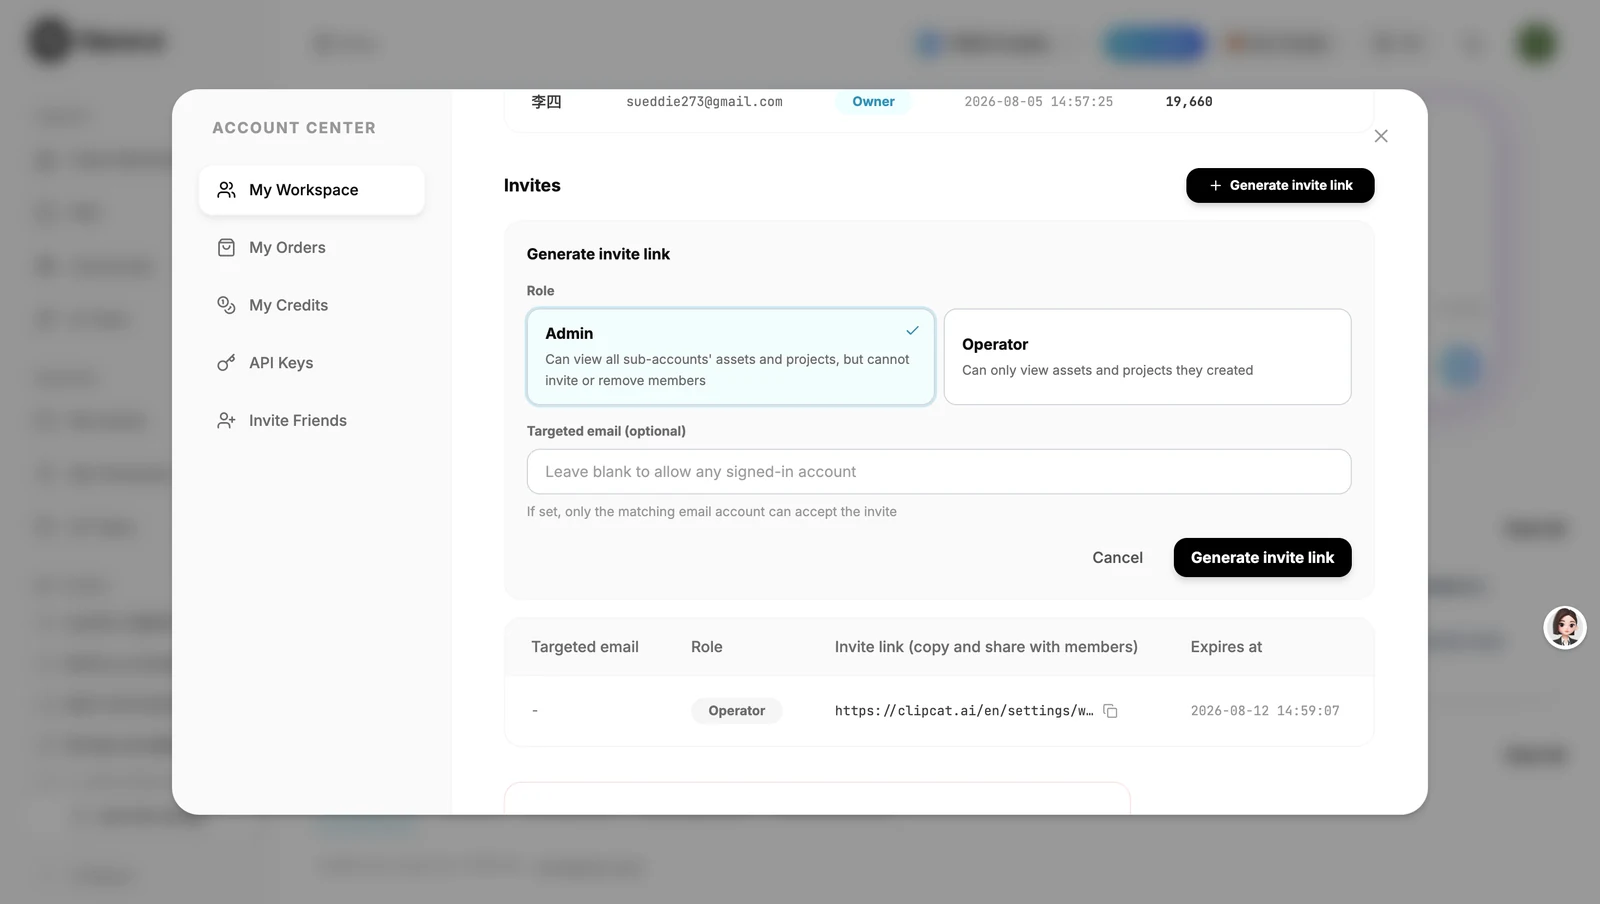
In your Workspace, click "Generate invite link" and set the member's role first (Admin or Operator — you can change it later). Share the link with a teammate. They need to register on Clipcat first, then open the invite link with that account to become a sub-account and share your plan's credits and resources. You can also add a target email when generating the link so only that account can accept it.

  • Click "Generate invite link" and set a role
  • Members register on Clipcat, then open the link
  • Add a target email to restrict who can join
Clipcat Workspace generate invite link with Admin or Operator role and target email
Roles

Three roles · permissions

Set a role when you invite a sub-account, and change it anytime. Here's how the three roles compare.

Owner Full access
The Workspace creator
  • Full permissions across the Workspace
  • Sees every sub-account's videos and resources
  • Can invite members and make purchases
Admin Sub-account
Same as Owner, with two exceptions
  • Same permissions as the Owner
  • Sees all sub-accounts' assets and projects
  • Cannot invite members or make purchases
Operator Sub-account
Own content only
  • Sees only the assets and projects they created
  • Can't see other sub-accounts' videos or resources
  • Cannot invite members or make purchases
Step

Step 3 · Manage by account

Filter content by account in several places to find each member's work fast — and see credit usage down to the account.

3Account filter + credit breakdown

See who did what, at a glance.

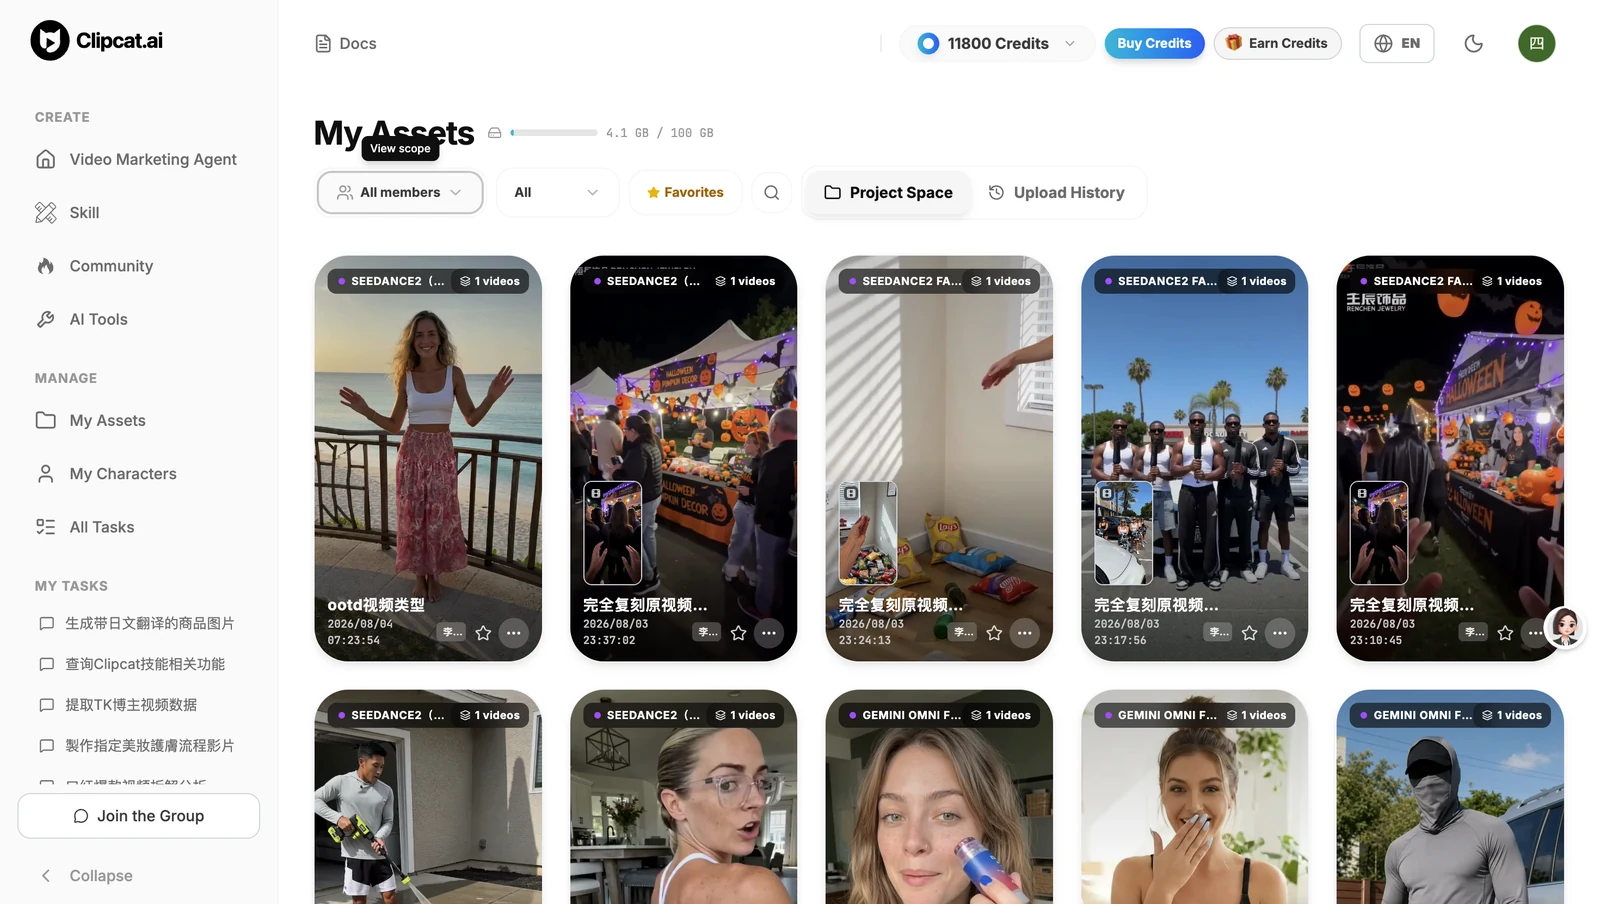
An account filter is built into My Assets, My Roles, my tool task lists and My Chats, so you can switch to any member and locate their output instantly. In "My Credits" you can also see how many credits each sub-account has used and earned — clear team usage that makes it easy to divide work and reconcile spend.

  • Filter assets, roles, task lists and chats by account
  • See each sub-account's used and earned credits in "My Credits"
  • Transparent usage for cleaner division of work
Clipcat My Assets page filtering generated videos by Workspace member account
How to get it
Workspaces are available on the Creator plan and above. Upgrade your plan to create a Workspace, invite sub-accounts, and let your team collaborate on one shared pool of credits.
Clipcat Spaces: Share Plan Credits for Team Collaboration